
3D Print Brim: Essential Tips

This guide discusses the advantages of 3D print brims, as well as how to set them up and handle frequent complications.
Introduction
In 3D printing, achieving successful prints often hinges on mastering bed adhesion and minimizing warping. One tool that can significantly aid in this endeavor is the humble brim.
This guide dives into the nuances of 3D print brims, elucidating their benefits, setup process, and troubleshooting techniques.
Understanding 3D Print Brim
Definition of a Brim
In the realm of 3D printing, a brim serves as a foundational element in the printing process. Picture the brim of a hat – a thin, flat extension that surrounds the base.
Similarly, in 3D printing, a brim is a thin, flat structure that encircles the base of a model. It extends outward from the model's footprint, creating an additional surface area that adheres to the print bed.
Importance of Using Brims in 3D Printing
Brims act as a preemptive solution to common 3D printing challenges. Warping and edge curling can degrade print quality, wasting time and material. By enhancing bed adhesion, brims strengthen the print's foundation. They also help distribute heat evenly, ensuring consistent print quality throughout the process.
When to Use a Brim
Though not essential for every print, brims become invaluable under certain circumstances. Models with small or narrow bases often benefit from the additional stability provided by a brim.
Furthermore, prints susceptible to warping, whether due to material properties or environmental factors like temperature fluctuations, stand to gain significantly from the use of brims.
Comparison with Rafts and Skirts

Source: printingatoms.com
Feature | Brim | Raft | Skirt |
|---|---|---|---|
Purpose | Adhesion, Stability | Foundation, Support | Decoration |
Material Usage | Minimal | High | Minimal |
Support | Moderate | Extensive | None |
Printing Time | Short | Long | Short |
Removal Difficulty | Easy | Moderate | Easy |
Impact on Print Quality | Improved adhesion, Warping prevention | Uniform bottom, Possible marks | No direct impact |
Brim:
Purpose: Enhances bed adhesion and stability by providing additional surface area for the model to adhere to the print bed.
Material Usage: Utilizes minimal material, typically extending only a thin layer around the base of the model.
Support: Offers moderate support to prevent warping and ensure stability during the printing process.
Raft:
Purpose: Serves as a robust foundation for the entire print, providing extensive support and improving overall adhesion.
Material Usage: Consumes a significant amount of material, as it extends beneath the entire print, creating a thick layer.
Support: Provides extensive support, especially beneficial for prints prone to warping or requiring extra stability.
Skirt:
Purpose: Primarily serves as a preparatory function, outlining the print area and aiding in priming the extruder before the actual printing process begins.
Material Usage: Utilizes minimal material, typically extending a thin outline around the print area.
Support: Provides no direct support for the print itself, serving more as a cosmetic feature than a structural one.
Benefits of Using 3D Printing Brims
Improved Bed Adhesion
Ensuring proper bed adhesion is crucial for successful 3D prints. Brims increase the contact area between the model and the print bed, allowing the initial layers to adhere more securely. This reduces the chances of detachment or shifting during printing. Improved adhesion leads to better layer alignment and smoother bottom surfaces, enhancing overall print quality.
Prevention of Warping
Warping is a common issue, especially with materials prone to contraction as they cool. Brims help mitigate this problem by encircling the base of the model, providing additional anchorage and support. This counteracts the forces that cause warping, such as uneven cooling or shrinkage, ensuring the print maintains its shape and dimensions.
Enhanced Stability for Tall Prints
Tall or slender prints often face stability issues, particularly in the early stages. Brims provide reinforcement by adding a supportive base layer to the print. This extra stability prevents wobbling, shifting, or tipping, ensuring tall prints are completed accurately and reliably.
Reduced Risk of Edge Curling
Edge curling occurs when outer layers lift or curl upward, compromising print quality. Brims act as a protective barrier, preventing edge curling by providing additional support and reinforcement. This keeps the edges securely anchored, resulting in cleaner, more precise prints with smoother edges and fewer post-processing requirements.
Setting Up 3D Printing Brim
Selecting the Right Software
Before diving into brim configuration, ensure your slicing software supports this feature. Most modern software, like Cura, Simplify3D, and PrusaSlicer, includes built-in brim support, but it's wise to double-check. Confirming brim support beforehand avoids unexpected issues and sets the stage for a smooth setup process.
Step-by-Step Guide to Adding a Brim
Once you've confirmed that your slicing software supports brims, it's time to delve into the specifics of configuring this crucial feature. Here's a step-by-step guide to adding a brim to your 3D prints:
Configuring Brim Width: The width of the brim plays a pivotal role in optimizing bed adhesion without compromising print quality. Adjust this setting based on your specific requirements, aiming for a width that provides ample adhesion while minimizing material usage. Experimentation may be necessary to find the optimal balance for your prints.
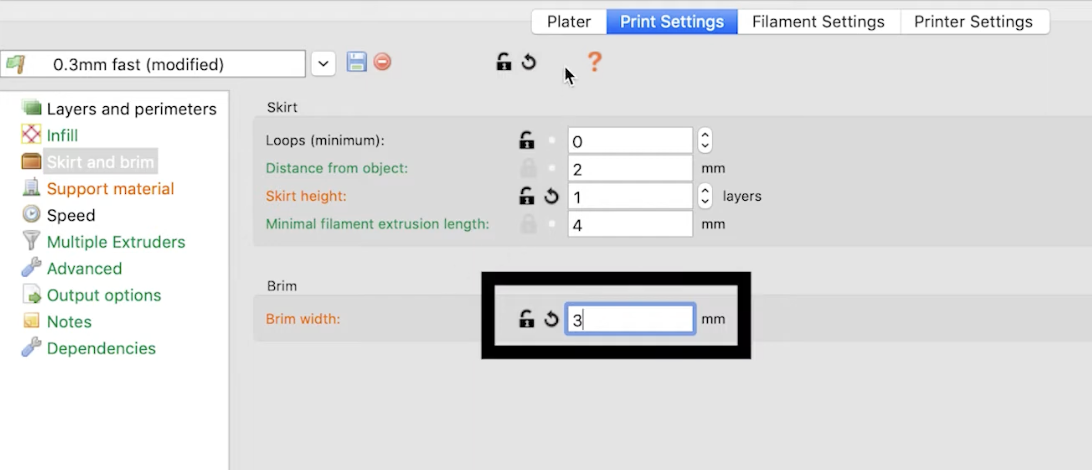
Configuring Brim Width
Source: Youtube:Jindra SykoraAdjusting Layer Height: Fine-tuning layer height settings is essential to achieve optimal brim adhesion and surface finish. Consider the layer height in relation to the width of the brim, ensuring that each layer adheres securely to the previous one without creating excessive gaps or uneven surfaces. Striking the right balance here contributes to overall print stability and quality.
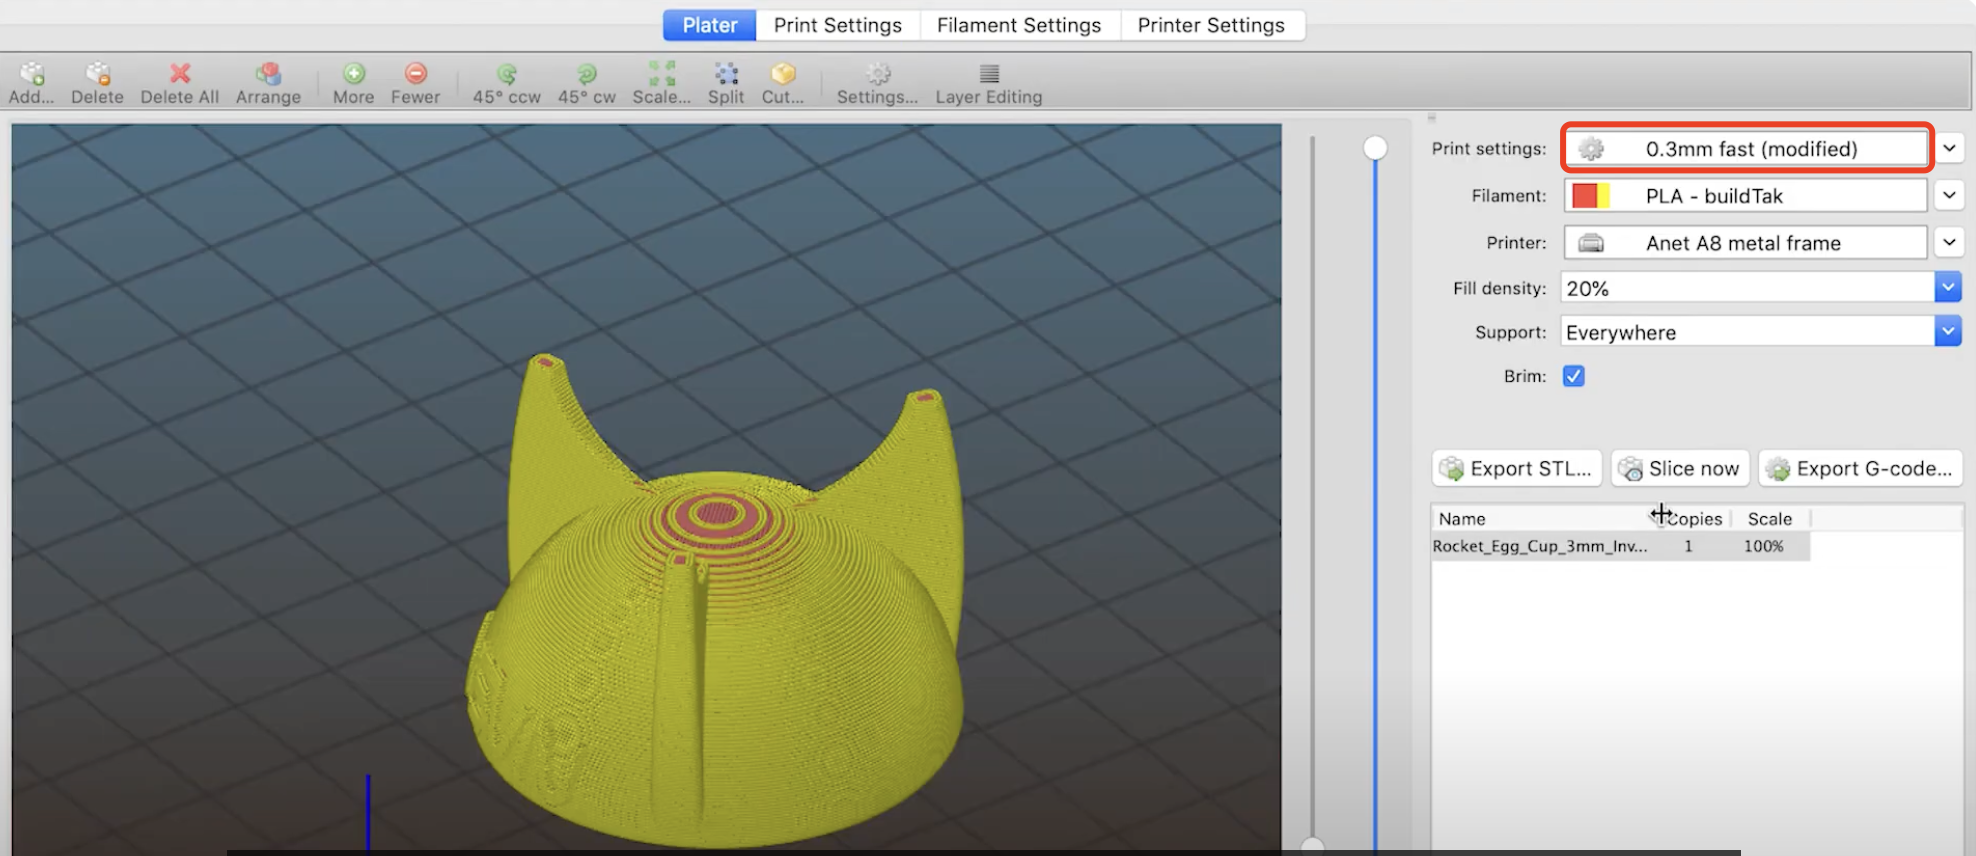
Adjusting Layer Height
Source: Youtube:Jindra SykoraOptimizing Brim Density: Strike a delicate balance between material usage and stability by adjusting the density of the brim. While a denser brim may offer greater support, it also consumes more material and may increase print time. Conversely, a sparser brim conserves material but may compromise stability. Experiment with different densities to find the sweet spot that meets your needs.
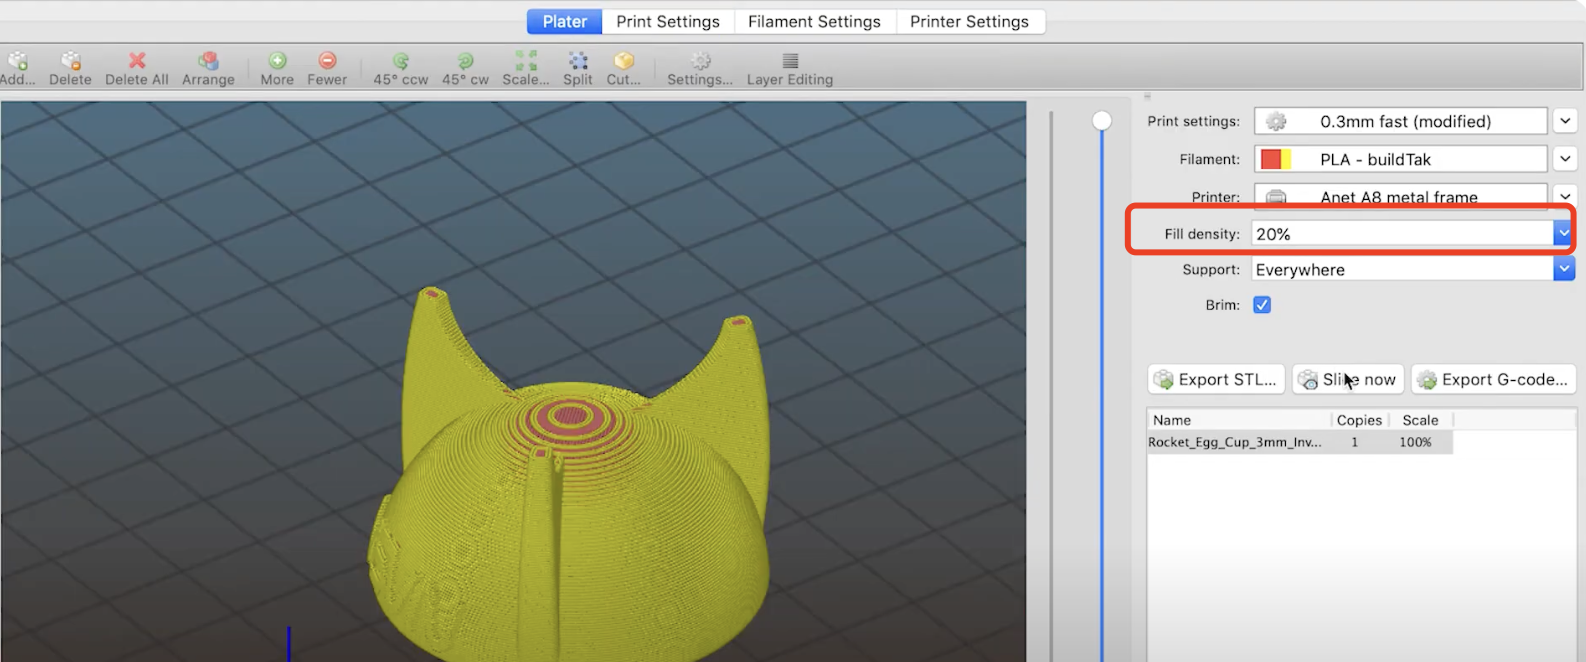
Optimizing Brim Density
Source: Youtube:Jindra Sykora


Common Settings for Different Materials
When engaging in 3D printing, it's essential to recognize that each type of filament has distinct characteristics affecting how brims function. Consequently, customize brim settings according to the specific material, experimenting with configurations and adjusting parameters like brim width, layer height, and density.
Materials such as PLA, ABS, PETG, and TPU may require different levels of adhesion and support. Careful adjustment of settings is necessary to achieve optimal results for each filament type.
Tips for Effective 3D Print Brim
Cleaning the Print Bed
A pristine, level print bed serves as the cornerstone for successful brim adhesion.
Regular maintenance is key – ensure the bed surface is free from debris and contaminants, and verify that it's level before each print.
Calibrating the Printer
Consistent printer calibration is paramount for achieving accurate layer adhesion and brim formation.
Periodically check and recalibrate your printer to mitigate the risk of uneven extrusion or bed leveling issues.
Monitoring the First Layer
The first layer sets the stage for successful brim adhesion. Keep a watchful eye as the initial layers are laid down, ensuring that the brim adheres securely to the print bed. If necessary, fine-tune settings in real time to achieve optimal adhesion and surface finish.
Post-Printing Brim Removal
Once the print job is complete, handle brim removal with care to preserve the integrity of the model. Use appropriate tools to gently separate the brim from the print without causing damage. A meticulous post-printing brim removal process ensures that the finished print retains its quality and detail, free from any blemishes or imperfections introduced during removal.
Troubleshooting Common Issues of 3D Print Brim
Brim Not Sticking to the Bed
When the brim fails to adhere, ensure the print bed is clean and level. Adjust brim settings like width and density for better adhesion. Experiment with higher bed temperatures or adhesive aids like hairspray. If issues persist, consider using alternative print surface materials.
Warped or Lifted Brims
Warped or lifted brims can stem from poor bed adhesion or uneven cooling. Optimize bed adhesion by cleaning and leveling the bed thoroughly. Maintain stable print environments and adjust settings to reduce printing speed and promote even cooling. Consider using denser brims or increasing brim width for added support.
Brims Difficult to Remove
If brims are challenging to remove, adjust settings to balance adhesion with removability. Consider reducing bed temperature or changing print surface materials to minimize adhesion. Use appropriate tools to carefully remove the brim without damaging the print.
Excessive Brim Material Waste
To minimize material waste, optimize brim settings to balance stability with efficiency. Experiment with reducing brim density or width while maintaining adequate adhesion. Ensure the print bed is properly prepared to maximize adhesion and minimize unnecessary material usage. Adjust print settings to optimize material usage and reduce waste during printing.
In summary, troubleshooting 3D print brim issues requires meticulous adjustment and experimentation. By optimizing bed preparation, refining brim settings, and maintaining printer calibration, users can overcome common challenges and achieve higher print success rates.
Conclusion
Mastering the art of 3D print brims empowers makers to achieve consistent, high-quality prints with minimal hassle. By understanding the benefits, setting up brims effectively, and troubleshooting common issues, you can harness the full potential of this invaluable tool in your 3D printing endeavors. With attention to detail and a dash of experimentation, perfect prints are well within reach.
Achieve Perfect Prints with Unionfab
Unionfab is a company that excels in the field of 3D printing, committed to delivering top-tier 3D printing solutions to our customers.
With a focus on quality and innovation, we strive to meet the diverse needs of our clients across various industries. We ensure that every project is executed with precision and care.
For more details or inquiries, contact us.
